
Welcome to part 3 of our Magento 2 tutorial series. We have now covered environment setup, Magento installation and general Magento concepts. We will now dive into developing a custom theme for Magento.
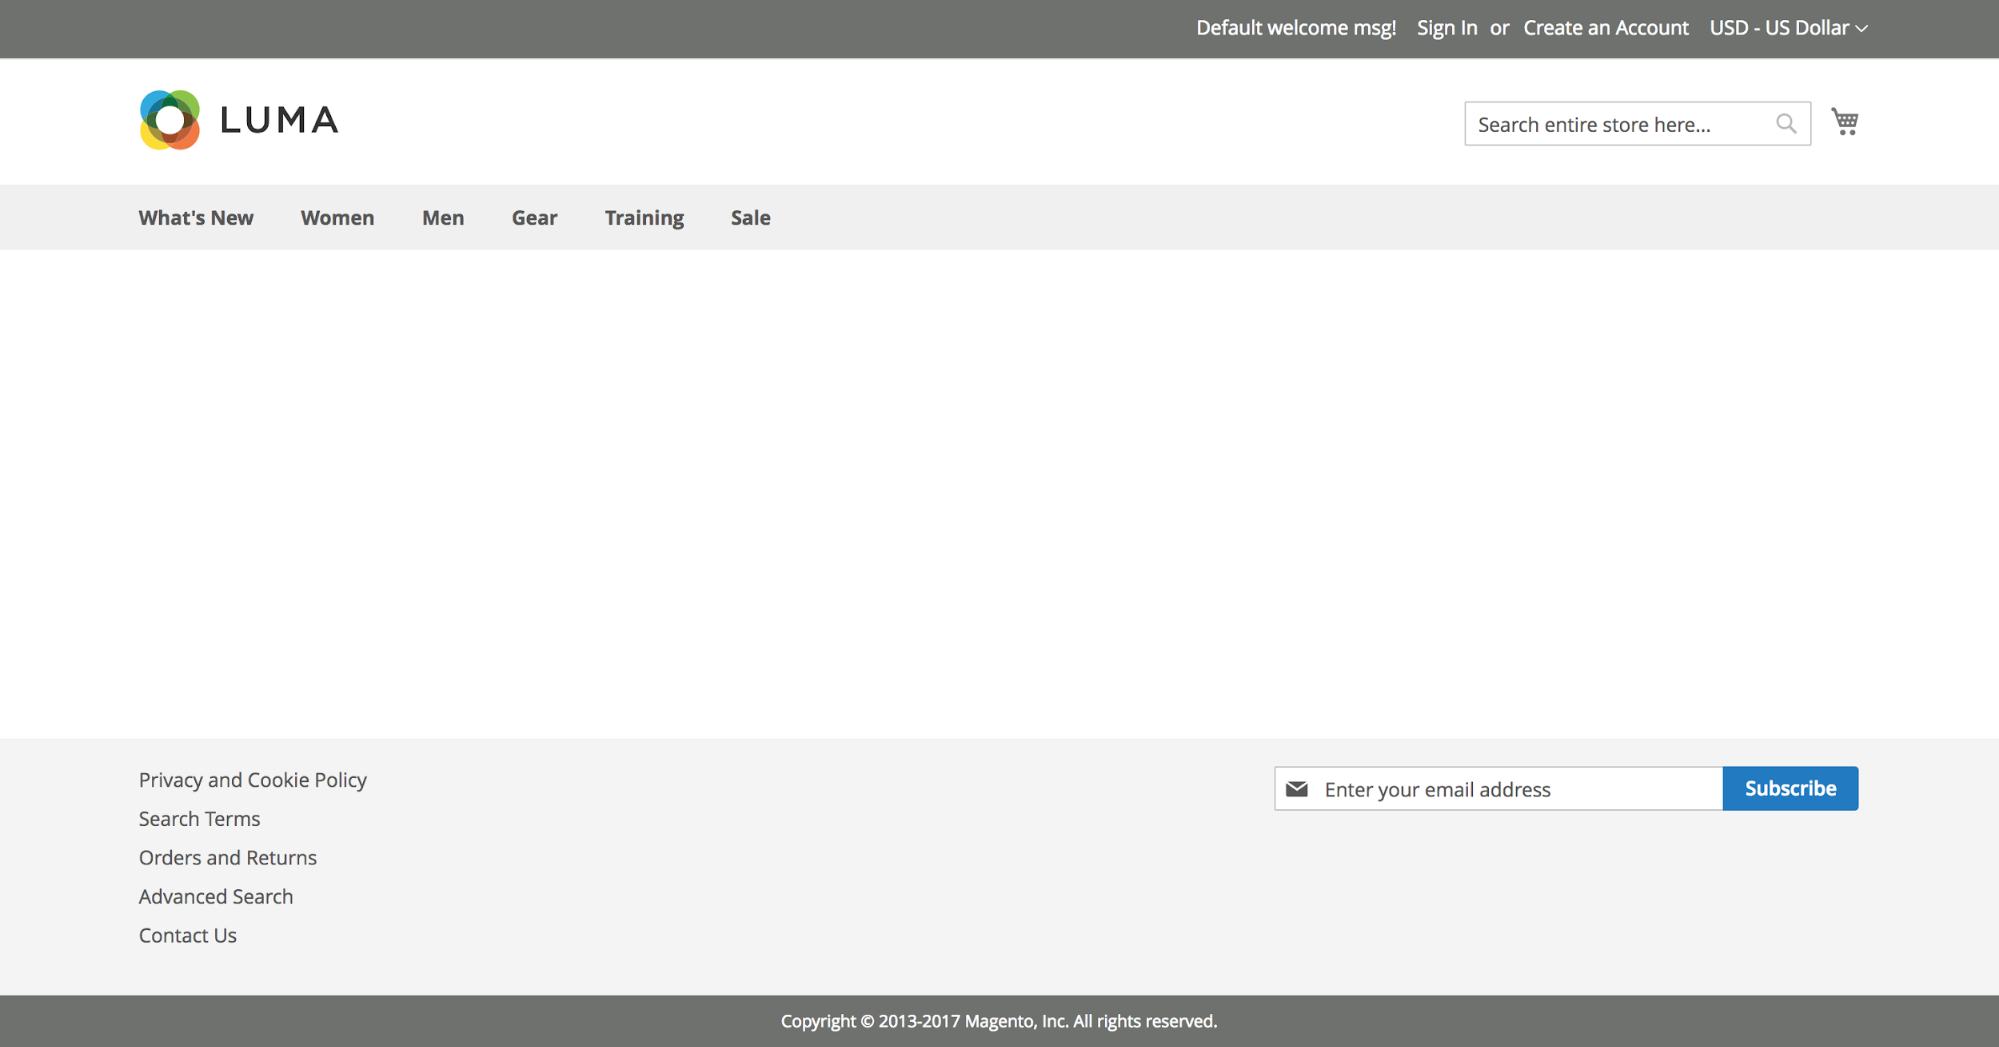
Themes are what define the appearance and design of your Magento stores. The default Magneto theme is a ‘Blank’ style. Since we installed the sample data, our theme is currently set to ‘Luma’. To see the difference, we will be disabling Luma and switching to the Blank style.
Changing Active Theme
First, login to your admin HTML and click Content->Configuration.

We want to edit the theme in this last selection. There are multiple options here due to the ability to define a global default theme, a theme for a specific website, and even more specifically themes for stores on that website. These are more advanced topics which we will not yet cover. However if you click the edit button for this store it will bring you to a configuration page. Here we want to change the Applied Theme from the Luma theme to the Blank theme.
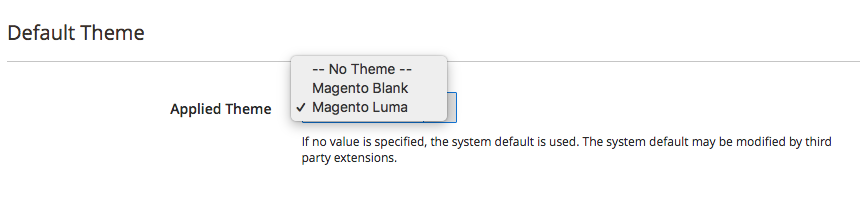
After we do this, save the configuration. Once it has finished saving, take a look at our store.
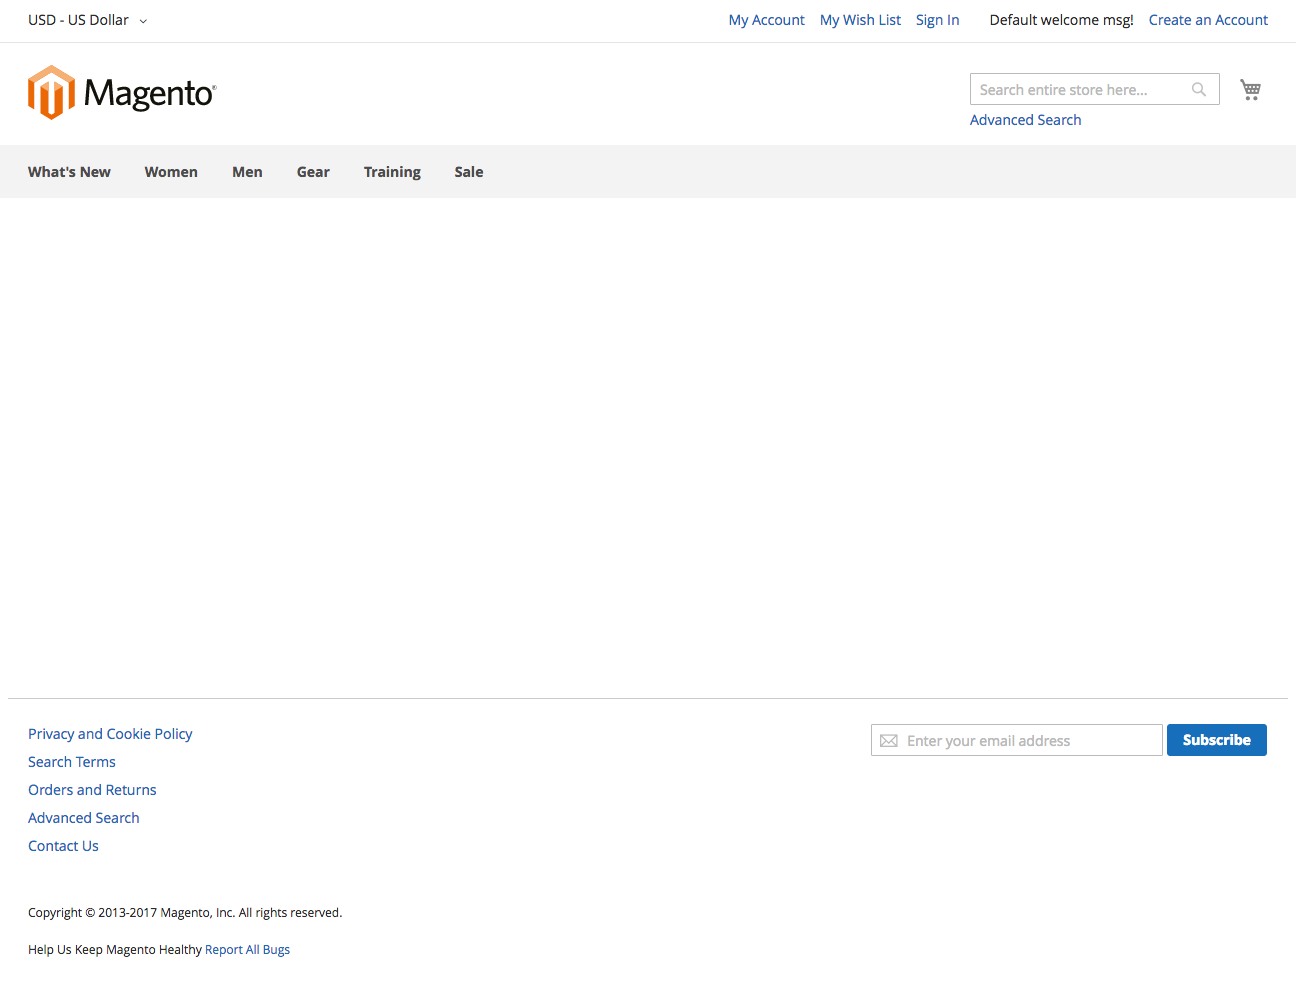
As you can see, the store is now simpler. This is the default blank theme which can be used to build your own themes, or you can base your theme on Luma. Note that our categories and products are still in our store, only the appearance has changed. Now that we know how to switch which theme is active, we’re going to build our own theme!
Theme Setup
The first thing to know is that your own themes will be located in app/design/frontend or app/design/adminhtml depending on what you are editing. 1. Create a module folder in app/design/frontend. We will be calling ours ‘Training’ 2. Inside of the Training folder, create ‘TestTheme’ a folder which will serve as the name of your theme. 3. Create a theme.xml inside of TestTheme
app/design/frontend/TestTheme/theme.xml
<theme xmlns:xsi="http://www.w3.org/2001/XMLSchema-instance" xsi:noNamespaceSchemaLocation="urn:magento:framework:Config/etc/theme.xsd">
   <title>Test Theme</title>
   <parent>Magento/luma</parent>
</theme>
Breaking this XML code down: * The title attribute is how the name of the theme will be displaying in the admin CMS * The parent is the fallback for this theme, if any file doesn’t exist in our theme it will ‘look up’ to the parent to find the same file and use that instead.
We then need to create a composer.json file in TestTheme
app/design/frontend/Training/TestTheme/composer.json
{
 "name": "magento/training-test-theme",
 "description": "N/A",
 "require": {
   "php": "~5.5.0|~5.6.0|~7.0.0",
   "magento/theme-frontend-luma": "~100.0",
   "magento/framework": "~100.0"
 },
 "type": "magento2-theme",
 "version": "1.0.0",
 "license": [
   "OSL-3.0",
   "AFL-3.0"
 ],
 "autoload": {
   "files": [ "registration.php" ]
 }
}
This file will serve to be the way which your theme is distributed to other users if you choose to do so, you can read more about Composer integration with Magento here Next we will create the registration.php file which is referenced in the composer.json file
app/design/frontend/Training/TestTheme/registration.php
<?php
\Magento\Framework\Component\ComponentRegistrar::register(
   \Magento\Framework\Component\ComponentRegistrar::THEME,
   'frontend/Training/TestTheme',
   __DIR__
);
This file will tell Magento where to find the theme when it attempts to load it
We should now be ready to try to enable this new theme! Follow the same steps as before to switch from Luma to Default, except now you should see our new theme as an option. After saving the configuration, if we visit our store we should see this:
Now our theme is an exact copy of the Luma theme, since we have not overwritten anything. But wait, where did all of the front page go? Luma actually uses static blocks to render some information, so we will setup the front page to display this as well. Static blocks can be very useful if you have content that you wish to modify frequently or if the client desires an easy way to change some portion of content on a page without having to edit the source code.
Inserting Static Block from the CMS
Login to the admin panel, and go to Content->Pages, click Edit on the Home Page row
Under content, inside of the editor add
and save. The {{}} is an escape character sequence used by Magento to indicate that the contents of the curly braces should be processed by Magento, usually into a block. You can find the block which we are referring to here by going to Content->Blocks and finding the block which matches the identifier we used for block_id
If you visit the front page you should now see the nice landing page that was there previously.
Modifying Existing Templates
Next we want to add a message about a money back guarantee to all products in their description. Since we don’t want to have to include this in every product description, we can modify the template to display this message for us! Navigate to any product in our store.
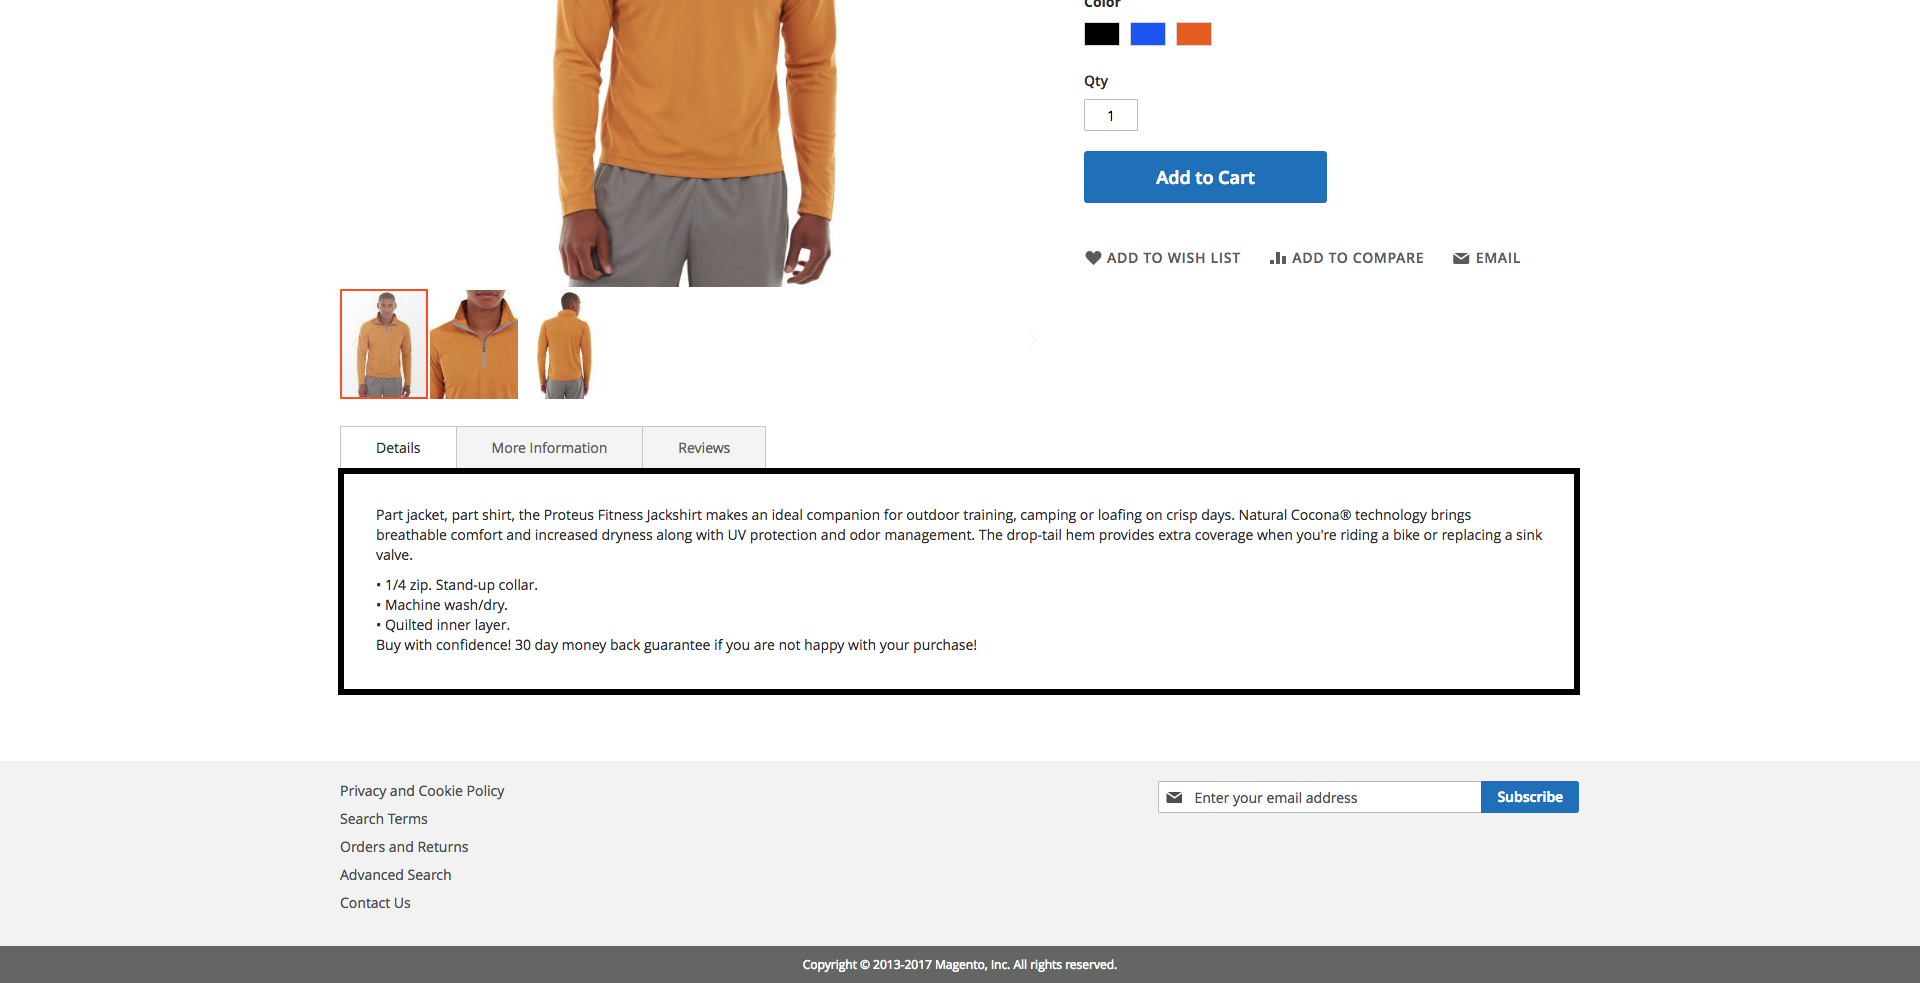
This highlighted area is what we are targeting, we want to add a message to the end of this description area. But how can we determine where this is HTML is coming from? We can use template path hints.
Go to your admin panel, navigate to Stores->Configuration. On the left side of this page under Advanced, click Developer. Under Debug turn Enable Template Path Hints for Storefront to Yes.
Once again, for these changes to take effect we need to clear the cache.
Php bin/magento cache:flush
You may quickly be noticing that if you do something and what you expected to happen doesn’t, then clear the cache. Caching can be disabled in the admin panel if you do not wish to flush the cache so frequently but this will result in very slow page loads.
Now if you refresh the product page you’ll see a whole lot of information. While this may look overwhelming, let’s take a look at what’s going on. Each red dotted line surrounding a piece of the page is associated with a file path. This file path is the template file from which this HTML is being created. If we look at the description area we can see that there is a path like
/vendor/magento/module-catalog/view/frontend/templates/product/view/attribute.phtml
However if you look on the page this attribute.phtml file is being used in multiple places, so we can’t just modify it directly without changing many other things. Sometimes the template hints are not lined up correctly with what they are referring to, as is the case with the template file we are looking for. Above the product area you can see a path hint for
/vendor/magento/module-catalog/view/frontend/templates/product/view/details.phtml
which just from the name seems to be what we’re looking for. Navigate to that folder, copy the contents of the entire file. Let’s create an override for this file by copying the file structure.
Inside of our TestTheme, create a Magento_Catalog folder
This name comes from the path we saw earlier
/vendor/magento/module-catalog/view/frontend/templates/product/view/details.phtml
Inside of Magento_Catalog create a file structure as follows:
TestTheme/Magento_Catalog/templates/product/view/details.phtml
Inside of the new details.phtml file, paste what you copied from the other details.phtml file. You can see this file is looping over several detailedInfoGroup items as name, so we can check in the loop for the name we want which is product.info.description. If you are unsure what you want to target, you can always do <? php echo $name ?> somewhere in the loop so you can determine what each section is called by displaying the name on the page.
TestTheme/Magento_Catalog/templates/product/view/details.phtml
<?php if ($detailedInfoGroup = $block->getGroupChildNames('detailed_info', 'getChildHtml')):?>
   <div class="product info detailed">
       <?php $layout = $block->getLayout(); ?>
       <div class="product data items" data-mage-init='{"tabs":{"openedState":"active"}}'>
           <?php foreach ($detailedInfoGroup as $name):?>
               <?php echo $name ?>
               <?php
               $html = $layout->renderElement($name);
               if (!trim($html)) {
                   continue;
               }
               $alias = $layout->getElementAlias($name);
               $label = $block->getChildData($alias, 'title');
               ?>
               <div class="data item title"
                    aria-labeledby="tab-label-<?= /* @escapeNotVerified */ $alias ?>-title"
                    data-role="collapsible" id="tab-label-<?= /* @escapeNotVerified */ $alias ?>">
                   <a class="data switch"
                      tabindex="-1"
                      data-toggle="switch"
                      href="#<?= /* @escapeNotVerified */ $alias ?>"
                      id="tab-label-<?= /* @escapeNotVerified */ $alias ?>-title">
                       <?= /* @escapeNotVerified */ $label ?>
                   </a>
               </div>
               <div class="data item content" id="<?= /* @escapeNotVerified */ $alias ?>" data-role="content">
                   <?= /* @escapeNotVerified */ $html ?>
                   <!-- Display Money Back Guarantee on All Products -->
                   <?php if ($name === 'product.info.description'): ?>
                       <?php echo 'Buy with confidence! 30 day money back guarantee if you are not happy with your purchase!' ?>
                   <?php endif; ?>
               </div>

           <?php endforeach;?>
       </div>
   </div>
<?php endif; ?>
After we have added this code, you should be able to clear your cache and then refresh any product page to see this new message being displayed at the bottom of every description.
So while this works just fine for what we were trying to accomplish, what if we wanted to add another tab to the product description instead? In addition to Details, More Information, and Reviews we want to have a ‘Warranty Info’ tab instead of the text at the bottom of the description in order to bring more attention to the warranty. Let’s do that next!
Layouts and Custom Template
We have been working with templates, now we are going to modify a layout. We are going to find the template we want to target for modification. Since we are going to change the location of the details block we have already modified, we can look in
vendor/magento/module-catalog/view/frontend/layout/
and find the layout file we wish to modify. The one we are looking for is catalog_product_view.xml because it refers to the product.info.details block. We want to match the file name in order to override the layout with anything we put in our file. The more you work with Magneto, the more easily you will be able to determine where things are most likely to be located in the folder structure. Create the following file in our custom theme.
TestTheme/Magento_Catalog/layout/catalog_product_view.xml
<?xml version="1.0"?>
<page layout="1column" xmlns:xsi="http://www.w3.org/2001/XMLSchema-instance" xsi:noNamespaceSchemaLocation="urn:magento:framework:View/Layout/etc/page_configuration.xsd">
   <body>
       <referenceBlock name="product.info.details">
           <block class="Magento\Catalog\Block\Product\View" name="warrantyinfo.tab" as="warrantyinfo" template="product/view/warranty_info.phtml" group="detailed_info" >
               <arguments>
                   <argument translate="true" name="title" xsi:type="string">Warranty Info</argument>
               </arguments>
           </block>
       </referenceBlock>
   </body>
</page>
In this layout file, the reference block is product.info.details. The referenceBlock is the block we are targeting for modification. We had previously modified the details template, now we are changing the layout. We are specifying a template we want to use for the content of this new tab with the template="product/view/warranty_info.phtml", which we have yet to create. Lets do that now.For the sake of keeping it simple, we’re just going to put an unordered list with a couple of list items in our template.
TestTheme/Magento_Catalog/templates/product/view/warranty_info.phtml
<ul>
   <li>30 Day Money Back Guarantee</li>
   <li>Highest quality materials, buy with confidence!</li>
</ul>
Now clear your cache and reload the page, you should see a new tab added to the product details area. If you want you can now delete the details.phtml in the templates/product/view folder since we have the same information in a new tab now. Now that we’ve added a tab, how do we remove one? Let’s get rid of the reviews tab next.
Removing a tab is very similar to adding a tab. Inside of out catalog_product_view.xml we just need to add one line
<referenceBlock name="reviews.tab" remove="true" />
As you can see we once again referenced a block by name, and set remove to true. You may be wondering how we determine what the name of the block we want to remove is. The review block name is set in the Review module. If we look at vendor/Magento/module-review/view/frontend/layout/catalog_product_view.xml you’ll see this piece of code
vendor/Magento/module-review/view/frontend/layout/catalog_product_view.xml
<referenceBlock name="product.info.details">
   <block class="Magento\Review\Block\Product\Review" name="reviews.tab" as="reviews" template="Magento_Review::review.phtml" group="detailed_info">
       <block class="Magento\Review\Block\Form" name="product.review.form" as="review_form">
           <container name="product.review.form.fields.before" as="form_fields_before" label="Review Form Fields Before"/>
       </block>
   </block>
</referenceBlock>
This all looks very similar to what we have already done to add our own custom tab, except this is adding a Review tab named reviews.tab. So if we target this for removal in our themes catalog_product_view.xml then it is no longer displayed. Clearing the cache and refreshing the page will result in the reviews tab no longer being on the product page.
So far we have added and removed a block, now let’s move a block. This follows a very similar paradigm as before.
<move element="product.info.details" destination="product.info.main" before="product.info.price"/>
Instead of referenceBlock we are using move. The ‘referenceBlock’ here is essentially element, which is the block which we want to move. Destination is the container we want the block moved to, and before allows to have further control over where the block will be located. You can also use after. Destination and before were determined by looking in the catalog_product_view.xml inside of module-catalog.
With the above code in our custom layout, you’ll see our product details block move to above the product price on the right hand side of the page. While this example may not be particularly useful, it does show how simple and powerful moving blocks can be.
In this article we have covered how to change our active theme, create a custom theme, and override a template file with our own. We also covered adding, moving, and removing blocks from a layout, and creating a custom template for new content. These are the fundamentals of custom theme creation in Magento. In the next article we will be covering creating a custom module in order to add custom blocks and controllers to our store.