
Magento 2 is the latest version of the very popular Magento e-commerce platform. It brings many performance and usability improvements to the table. This is the first article in a series, from Ameronix in Richmond, Virginia, which will cover everything from environment setup and Magento concepts to custom module creation. In this article we will be covering environment setup and Magento installation. We are using tools which are specific to OSX (Laravel Valet and brew) and thusly all CLI commands will pertain to OSX as well.
Environment Setup
Magento 2 Requirements:
- PHP (7.1.x or higher recommended)
- MySQL
- Nginx or Apache for hosting the Magento installation, we will use Laravel Valet (nginx)
PHP
- Update your brew by running ‘brew update’, if it is not installed then install brew by running:
/usr/bin/ruby -e "$(curl -fsSL https://raw.githubusercontent.com/Homebrew/install/master/install)" - Check if PHP is already installed by running
brew services listand looking for [email protected] - If you do not have PHP installed already, run
brew install [email protected] - Determine where your php.ini is located by running
php --info | grep php.ini - It should output something like
Configuration File (php.ini) Path => /usr/local/etc/php/7.1 - Open the php.ini located in this folder, there a few things we want to change
Max_input_vars = 180000Memory_limit = 2G(or more depending on your system)
- Restart PHP to apply these changes.
Brew services restart [email protected] - Due to the way Valet works, we need to setup [email protected] as the linked version for brew. Run
brew link [email protected] -fThe -f is required since [email protected] is now keg-only. - Check we applied these changes with:
which phpshould return/usr/local/bin/php, which indicates we have linked to the brew version of PHP. php --info | grep memoryShould display updated memory limit, if not look to see if another .ini file is listed that is overwriting what we changed
Valet
Instructions for installing Valet can be found here.
After Valet installation, navigate in the CLI to your development directory and run valet park
This will automatically setup a domain for any folders which are in the directory when they are added as [foldername].test
Magento Installation
There are multiple methods for installing Magento, however the CLI method is the recommended option.
- Magento can be downloaded from here. You can choose between a version which contains sample data and one which does not. For the purposes of this tutorial series, we will assume that you are using the sample data provided. Download the latest version (currently 2.2.3 at the time of writing this article)
- After downloading, unzip this folder into the directory where you ran
valet park, rename the folder it creates into something easy to remember like ‘magetraining’ (this folder name will become your website URL i.e. magetrainining.test) - Create a database in MySQL where Magento will store its data
Navigate to this folder in the CLI, and run the following command, replacing your own information where relevant
php bin/magento setup:install --admin-user admin --admin-password admin1234 --admin-firstname John --admin-lastname Doe --admin-email [email protected] --db-name magento --db-password myPassword --db-host localhostIf you experience
PHP Fatal Error Out of Memory, re-run the above command but with a flag to increase the memory limit furtherphp -dmemory_limit=6G [above command]After installation finishes, you should get a message
[SUCCESS]: Magento installation complete.
[SUCCESS]: Magento Admin URI: /admin_1d2589”
Make note of the admin URI, as you will need it to access the admin panel. However if you do not have this information, it can be found in the
app/etc/env.phpfile under ‘frontName’ for the backend.If you wish to install sample data, and you did not download the version of Magento which includes it you can also install from the CLI:
- Run
php bin/magento sampledata:deploy - If asked for a username/password, you need to setup your access keys on Magento Marketplace
- After the data has been deployed, run
php bin/magento setup:upgrade - If you get the error ‘Area Code Not Set’, run
php bin/magento sampledata:resetand then rerun the setup:upgrade command If you get the error
Warning: Error while sending QUERY packetthis is due to MySQL packet size and timeout limit. It needs to be increased in your my.cnf, which can be located in a few places but is most likely in/etc/my.cnf. Add the following lineswait_timeout = 300 connection_timeout = 300 max_allowed_packet = 6G
- Run
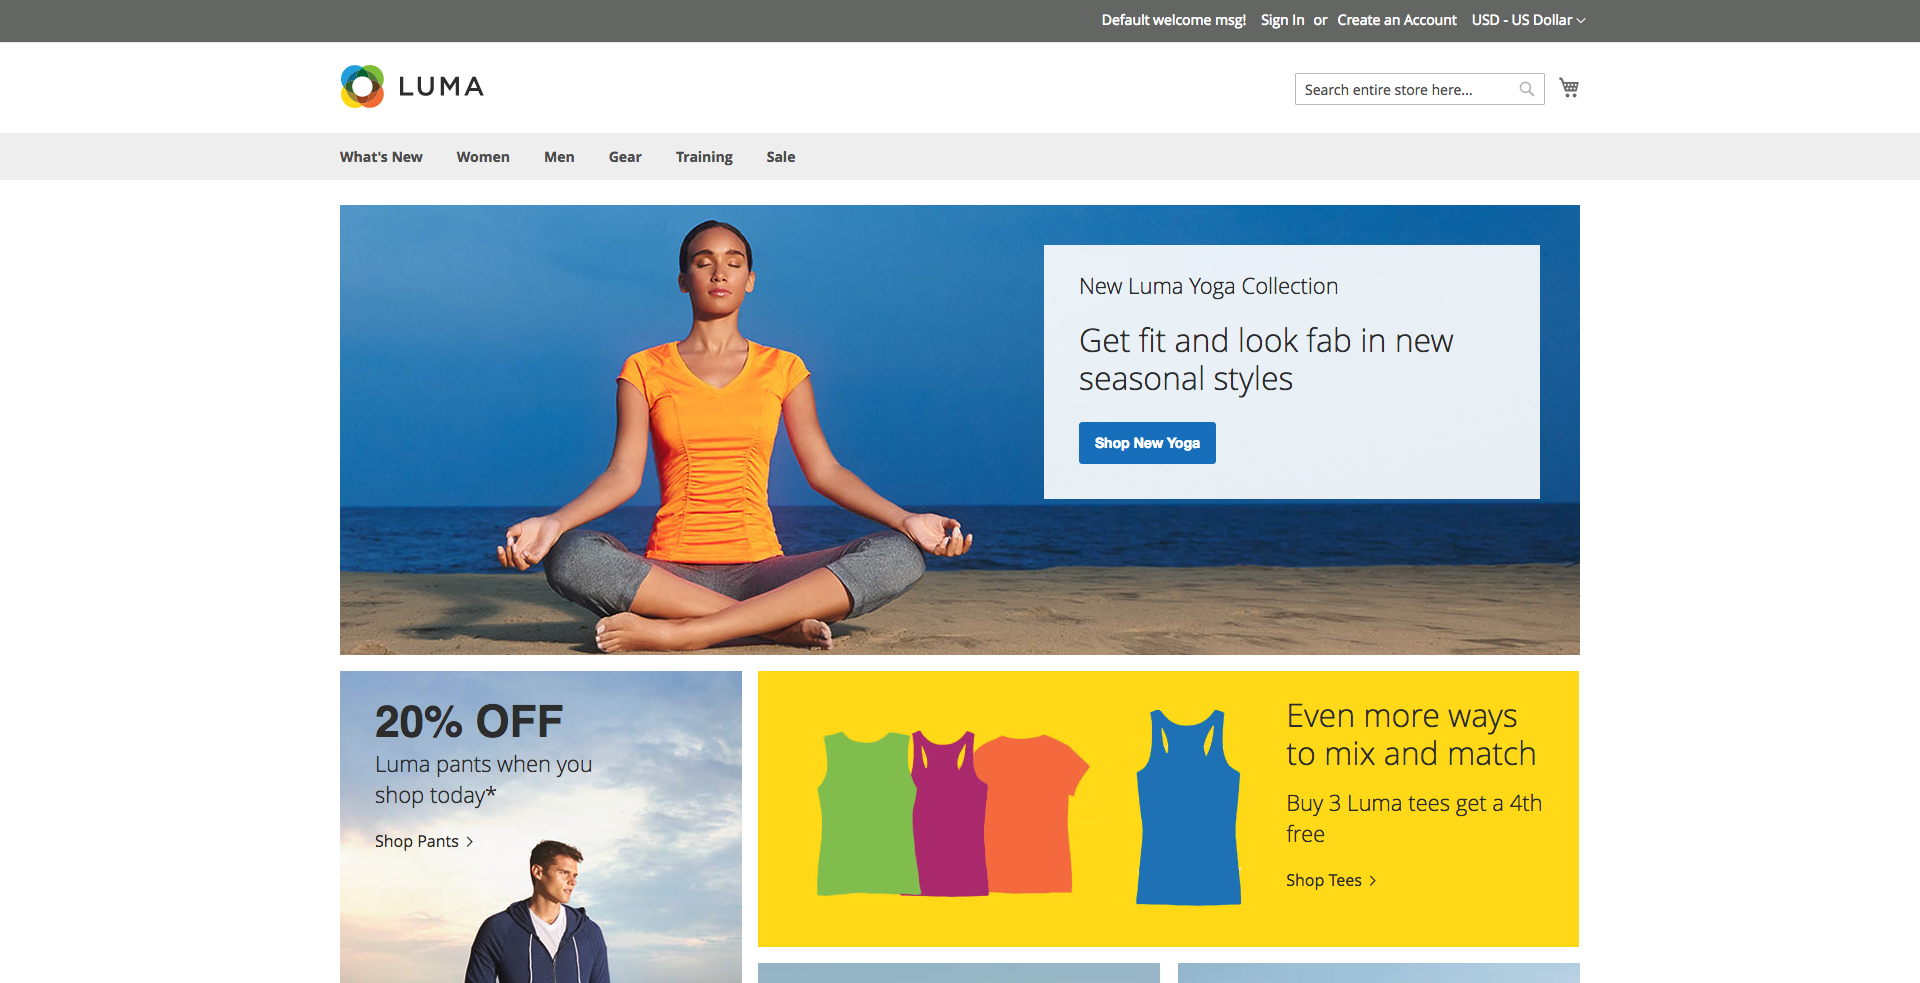
Congratulations, if you finished everything above without any errors then you’ve successfully installed Magento 2! You can now visit the URL for your site, which is the [directoryname].test, so magetraining.test for our example. Your site should look like the screenshot below.
Next we will access the admin panel. Visit the URL provided by Magento during the installation, or as mentioned earlier it can also be found in app/etc/env.php under ‘frontName’. It should be something like admin_1d2589. So we visit magetraining.test/admin_1d2589 and…
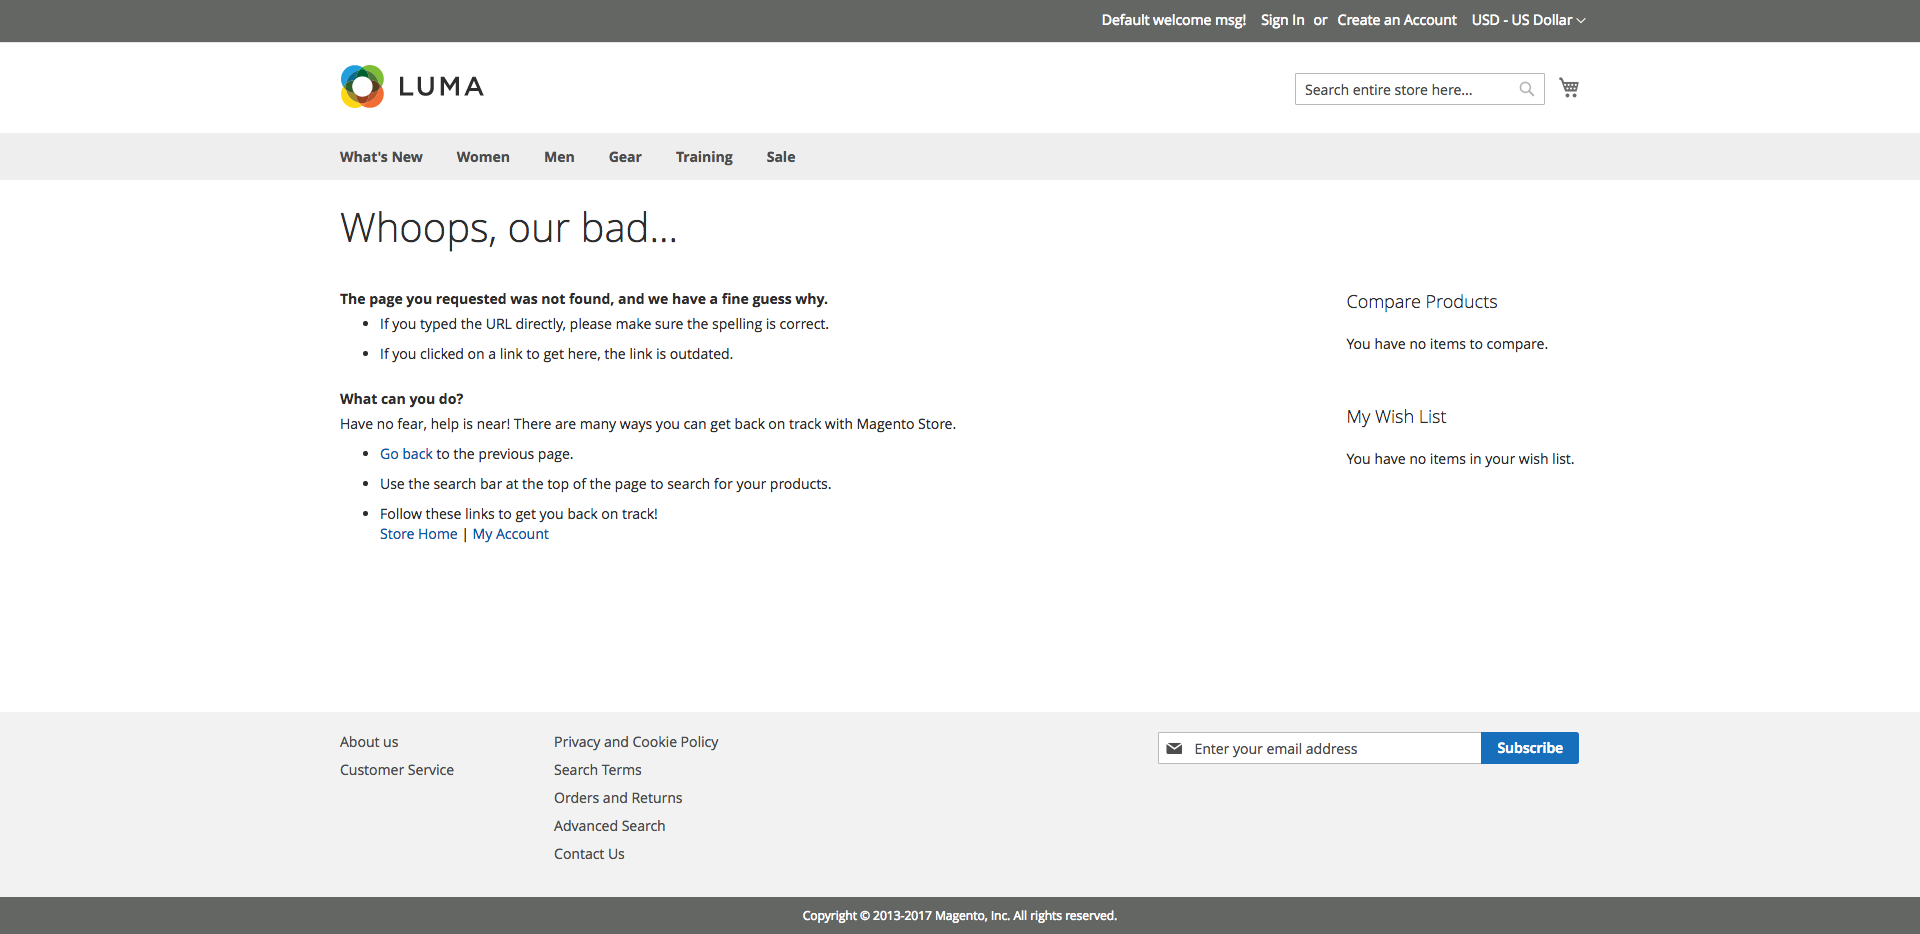
We get a 404. This may or may not have happened to you, but if it did we can resolve this in two simple steps.
Setup Magento to use URL rewrites by running php bin/magento config:set web/seo/use_rewrites 1
Clear the cache by running php bin/magento cache:flush.
Now revisit the admin URL, and you should be greeted by the admin login screen. Use the admin username and password you set during the setup:install of Magento to login. This will bring you to the admin panel.
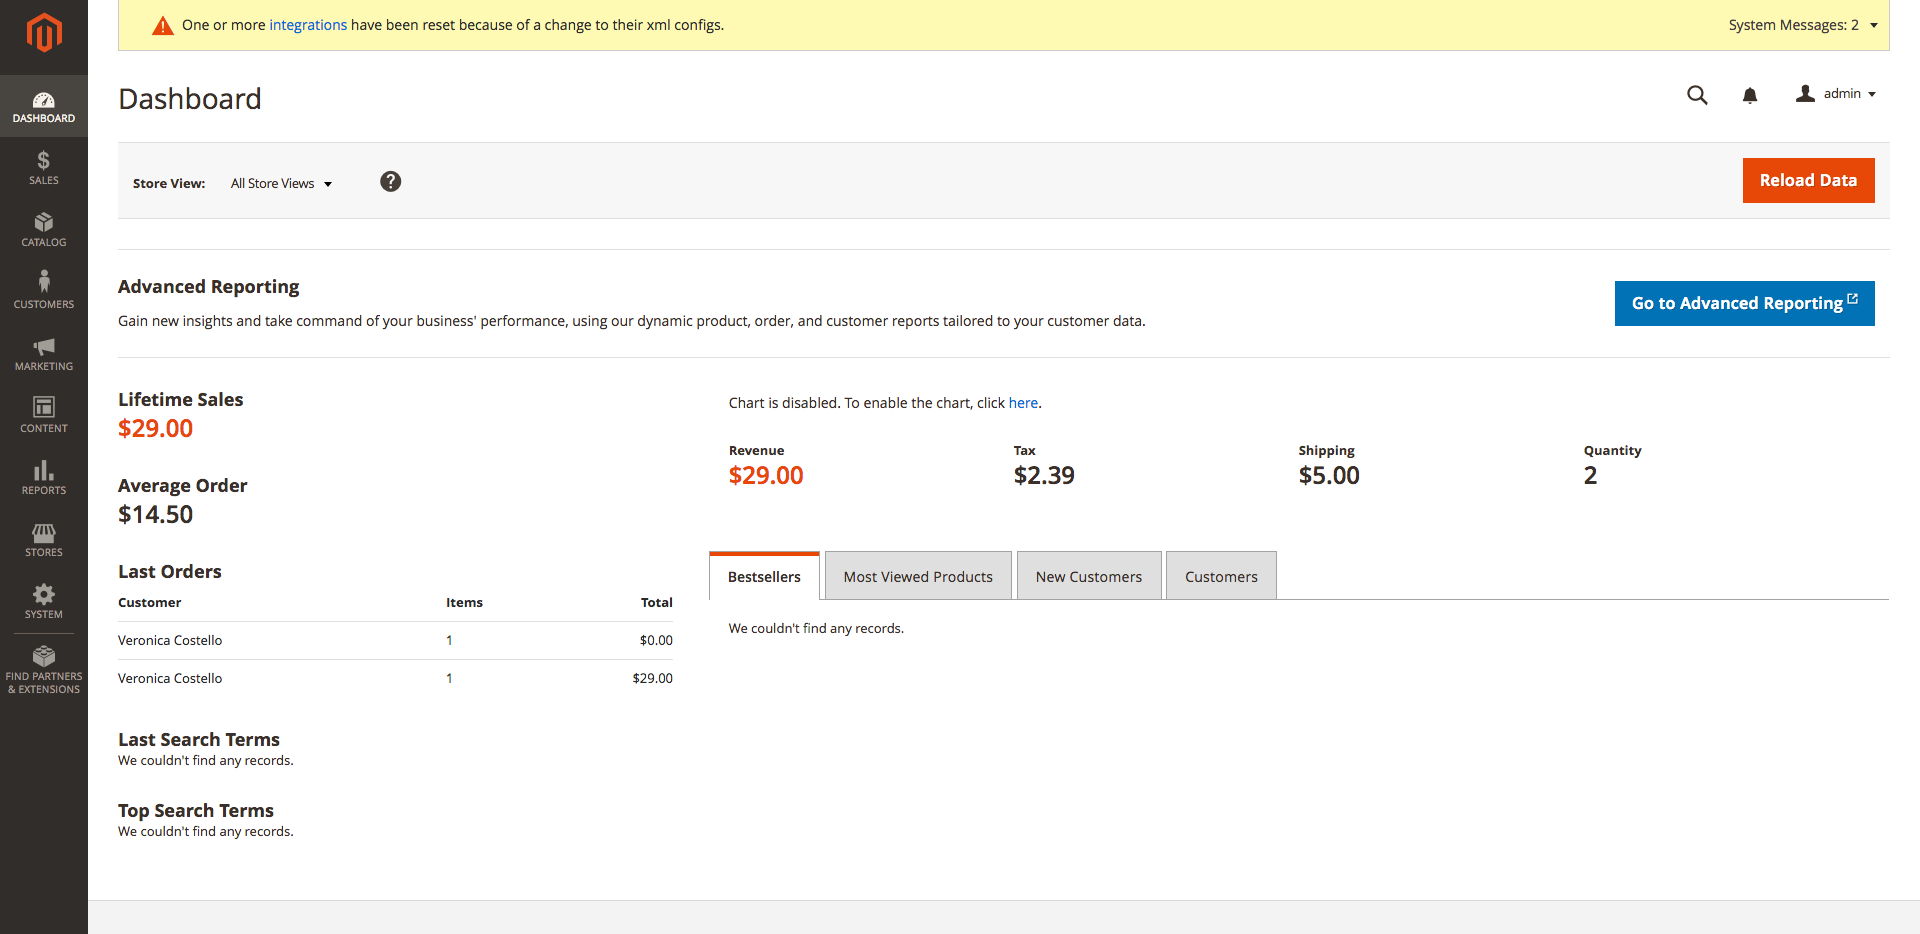
If you are familiar with Magento 1, you can immediately notice the improvement to the UI/UX of this admin panel. All navigation items are located on the left in pop-out menus.
This concludes the first part of this Magento tutorial series. We have created a standard Magento store, in future lessons we will be customizing our store with custom templates and modules. In the next part we will be discussing a general overview of Magento concepts.