
Welcome back to our Magento 2 tutorial series. If you have been following us closely, your new store is installed, the custom theme has added flair, and you set up Product Attributes to match your product line. Good job!
In this article, we will show you how to import products into Magento using its built-in import feature. While product addition can be done manually one at a time using Admin Panel > Catalog > Products > Add Product, a more elegant solution is to save all product data into a comma separated value (CSV) file and import this file. Importing products from a CSV file saves you time depending on your product catalog size, ensures that you have a backup of all your product data, and opens up the option of syncing product data to/from external sources.
Step 1, Option 1: Export product data
To import data into Magento properly, you will need to know what data is required, and what format your CSV file needs to follow. The easiest way to obtain this info is to start with a copy of existing product data. If your store already contains products or you have installed Magento sample data, you can export your current product data in CSV format, then use this as a starting point.
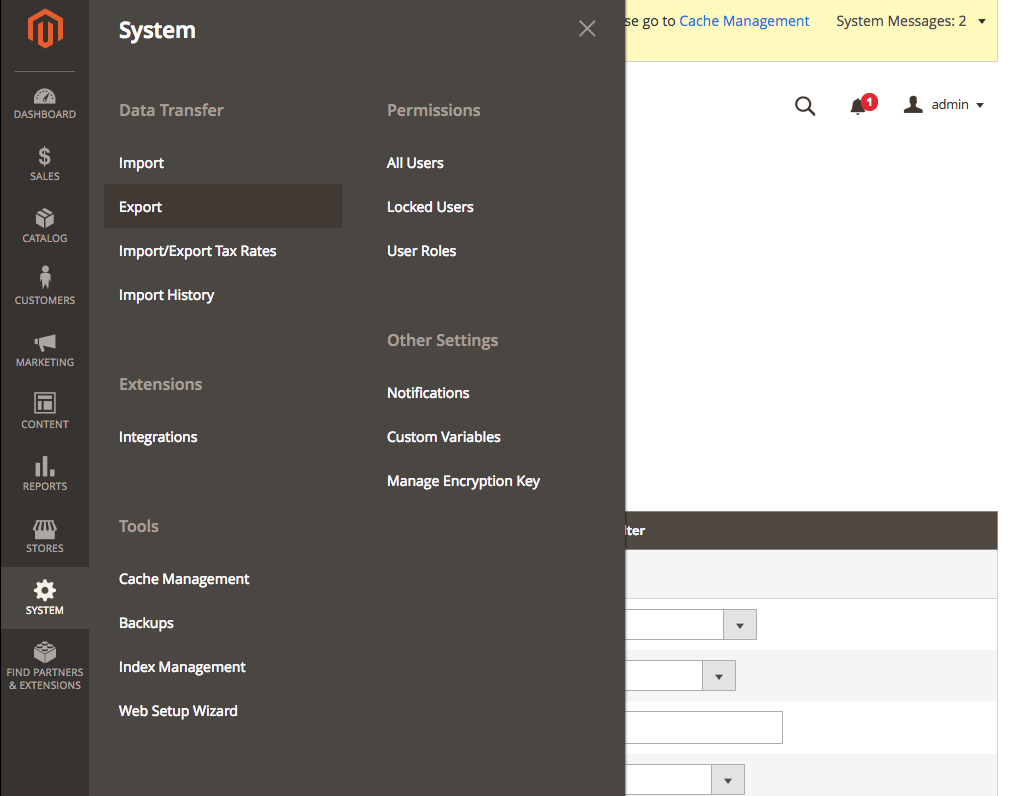
To download a sample product import file, log in to the Admin Panel and navigate to System > Data Transfer > Export

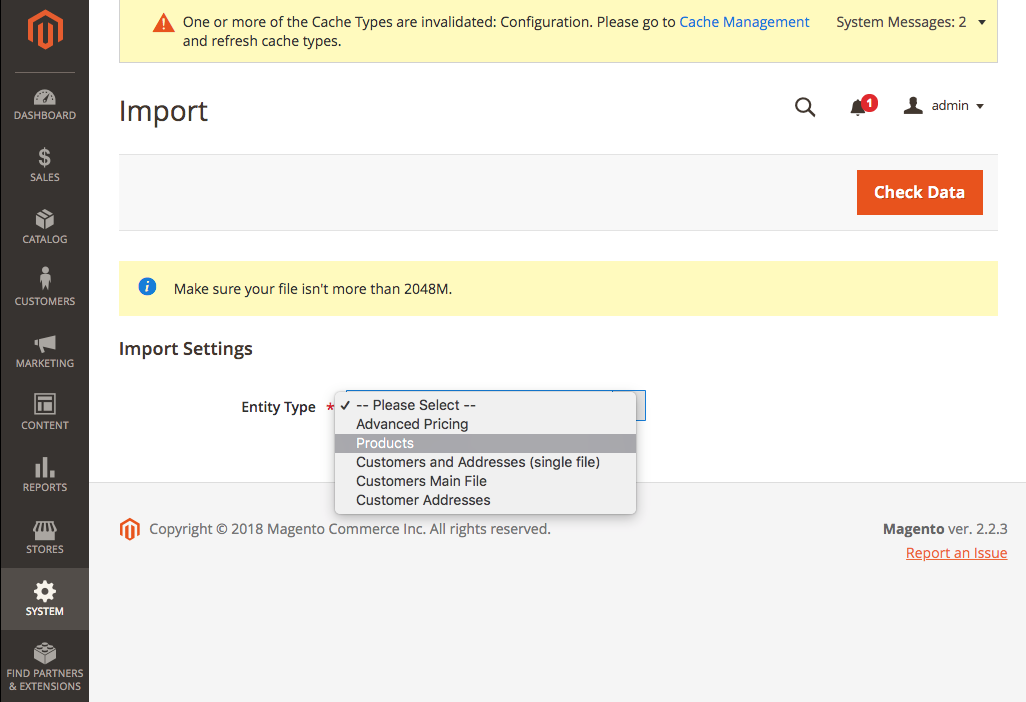
Select Products from the Entity Type dropdown, then click Continue at the bottom of the page.
Step 1, Option 2: Download a sample CSV file
If your store does not yet contain any products or sample products, you can still download a sample import file. However, note that this file will not contain all of the possible product attribute columns, about ten of them will be missing including columns for uploading product image file paths.
To download a sample product import file, log in to the Admin Panel and navigate to System > Data Transfer > Import
Select Products from the Entity Type dropdown, then click Download Sample File when the link appears
Step 2: (Optional) Remove Unnecessary Attributes
There are over eighty attributes (columns) that can be configured for each product, but not all of these are required or commonly used. Any attributes left blank in your CSV file will not be imported, so you are welcome to leave those columns in your spreadsheet. However, for easier readability or to prevent data being entered into unnecessary columns, you may want to delete any columns you do not plan on using.
In Magento 2.2.3 sku, name, price, product_type, and attribute_set_code are the minimum required columns for importing a product. Although an import with these columns will be successful, a few more attributes are required to get your product actually displaying in your store. You will need to tell Magento in which website(s) you would like each product to display via the product_websites column. If you only have one website configured, enter “base” into this column. You also need to enter a stock quantity in the qty attribute since Magento by default does not display out of stock items in your store.
Additional columns that you may want to include are categories, description, base_image, small_image, thumbnail_image, and additional_images.
To import bundled, configurable, or tier-priced products, additional attributes must be included. These special product types can be tricky to import, so I recommend reading more from this blog before attempting.
Step 3: Input Product Data
Once you have sample or current product data in CSV format, you can start adding product data. Note that some columns are case sensitive (e.g. product_type must use only lowercase letters, and attribute_set_codes begin with capital letters). When multiple values need to be entered into one column, they can be separated by a character of your choice, usually a pipe character is suggested (i.e. category1|category2 ). Descriptions and short descriptions can include html tags, and the appropriate formatting will be applied when Magento renders the description on your store site. Image columns should contain relative paths to the image(s) being imported, and the directory to which these paths are relative will be input into Magento during import.
To assign product attributes or categories, those attributes and categories must already exist in your web store. The import process will not create categories or attributes that do not already exist. If you need to create these, go into the admin panel and do so now.
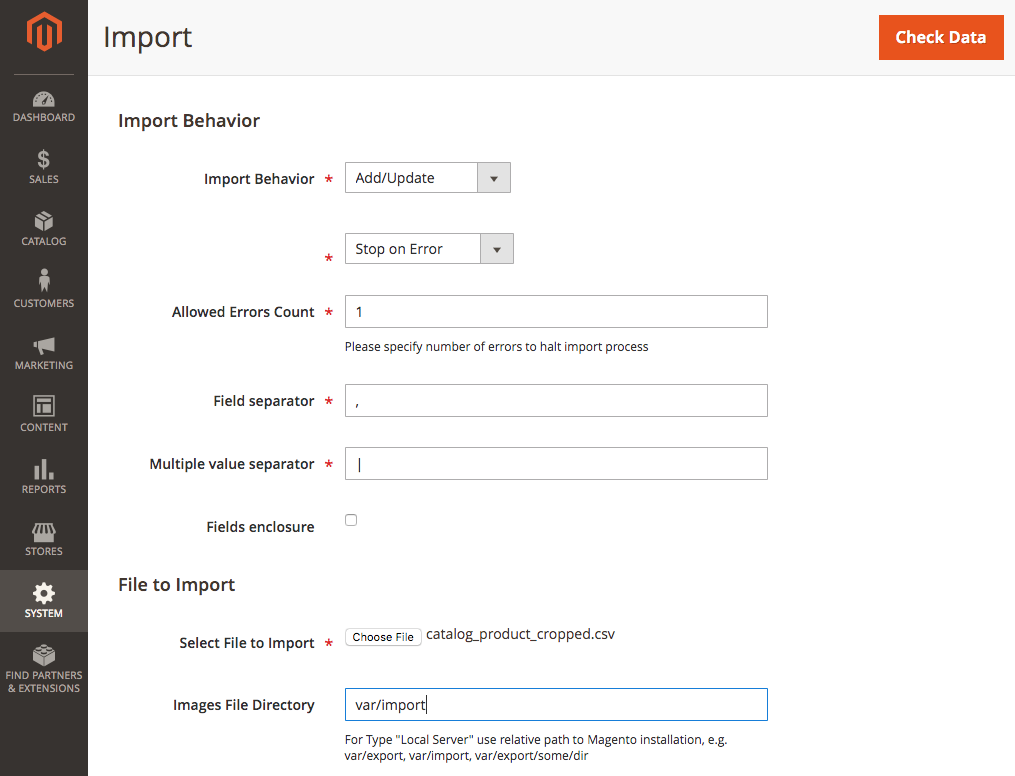
Step 4: Select Options and Import
Once you have all your categories and attributes created and your product data input, navigate to Admin Panel > System > Data Transfer > Import.

Select your desired values for Import Behavior (mine are shown above). It is best to Stop on Error so that you have a chance to fix any errors before the import completes. Select the file to be imported, then click Check Data. If Magento encounters an error, it will let you know. Simply resolve the error and run the import again.
Error!
Speaking of errors, Magento can throw a lot of them your way. If you get overwhelmed, Ameronix developers can help get you back on track. Call, email, or visit us in Richmond, Virginia and let us know what has you stuck.
